s3fs allows Linux to mount an S3 bucket via FUSE. s3fs preserves the native object format for files, allowing use of other tools like AWS CLI.
s3fs-fuse installation
Many linux distributions provide pre-built packages for s3fs-fuse installation
Arch Linux
sudo pacman -S s3fs-fuse
Debian 9 & Ubuntu 16.04 or newer
sudo apt install s3fs
Fedora 27 or newer
sudo dnf install s3fs-fuse
Gentoo
sudo emerge net-fs/s3fs
RHEL and CentOs7 or newer through via EPEL
sudo yum install epel-release
sudo yum install s3fs-fuse
SUSE12 and openSUSE 42.1 or newer
sudo zypper install s3fs
Example:
sudo apt install s3fs
Credential file and mount directory creation
You will need your Z1 Storage API credentials from the client area, login HERE.
**Create the file that will contain your login credentials by executing command:
**s3fs need to know your credentials so Z1 Storage can authenticate you
echo ACC_KEY:SEC_KEY > ${HOME}/.passwd-s3fs
- ACC_KEY - Z1 Storage Access key
- SEC_KEY - Z1 Storage Secret key
Set permissions for the password file
Setting permissions for the passwords file is required. Otherwise you won't be able to mount the Z1 Storage bucket. This also secures your credentials further.
chmod 600 ${HOME}/.passwd-s3fs
Create the mount point for a bucket
create a directy that we will use to mount your Z1 Storage cloud storage bucket onto. All your files and folders within bucket will be available under this directory once mounted.
sudo mkdir /mnt/CHOOSE-NAME
CHOOSE-NAME - any name you choose
echo ACC_KEY:SEC_KEY > ${HOME}/.passwd-s3fs chmod 600 ${HOME}/.passwd-s3fs sudo mkdir /mnt/CHOOSE-NAME
Mount a Z1 Storage bucket to a directory
You have completed the s3fs configuration. Now we can use s3fs to mount your S3 style bucket to a directory. This will make the content or your bucket appear within the directory you mounted. Making files and directory accessible locally.
sudo s3fs <your-bucket> <your-mount-point> -o passwd_file=${HOME}/.passwd-s3fs -o url=https://s3.z1storage.com:443 -o use_path_request_style -o allow_other
- name of bucket you own in Z1 Storage - directory we created in previous step -o allow_other - this option is optional, but without it only root will be able to access files within the mounted directory
sudo s3fs z1testbucket /mnt/clouddirectory -o passwd_file=${HOME}/.passwd-s3fs -o url=https://s3.z1storage.com:443 -o use_path_request_style -o allow_other
Testing your bucket mount
You can test that the mount was successful by first listing the content. If your bucket is empty, just like ours is for this tutorial, no content will be displayed.
ls <your-mount-point>
Example:
ls /mnt/clouddirectory/
We will now create a test file in the mount point and verify all is working correcty, by checking both the mount point, and by checking the File Explorer within the Z1 Storage Client area.
Example:
ls /mnt/clouddirectory/
touch /mnt/clouddirectory/test.txt
ls /mnt/clouddirectory/
test.txt
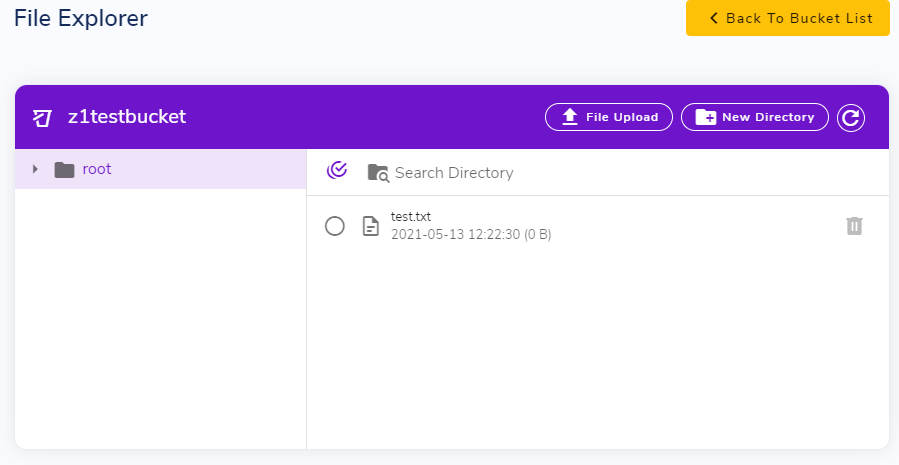
We see the same file is also visible within the Z1 Storage File Explorer.

Great! Our mount point is working!
Mounting bucket on startup
You can mount your bucket on system startup.
To do so you will need to add s3fs mount command to fstab.
echo "your-bucket your-mount-point fuse.s3fs _netdev,allow_other,use_path_request_style,url=https://s3.z1storage.com:443 0 0" >> /etc/fstab